Standing Hip Abduction with a Mini Band
Standing (hands on a wall) · Taking the leg out to the side with the muscles at the side of the buttock
A strength exercise with a resistance band: taking the leg out to the side with the muscles at the side of the buttock.
How longNew to it: one set of 8–12 with the lightest band, keeping good form. Used to it: 2–3 sets of 8–12, with a band that makes the last few feel fairly hard. Aim for 2–3 days a week, with at least a day between sessions for the same muscles.
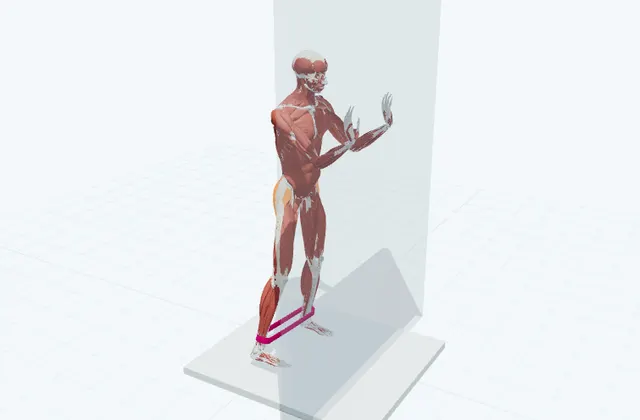
Position and focus
Standing (hands on a wall) · Taking the leg out to the side with the muscles at the side of the buttock
Starting position
Place the mini loop just above both ankles. Stand facing a wall with both hands on it. Place the feet hip-width apart with the toes pointing forwards.
Movement phases
1. Set up
Shift your weight onto the left leg and keep the pelvis level. Stand tall with the trunk upright.
2. Move out
Breathing out, keep the toes pointing forwards and slowly take the right leg straight out to the side against the band.
3. Hold
Hold for 1 to 2 seconds at a height where the trunk does not lean and the pelvis does not hike.
4. Return
Breathing in, slowly bring the leg back without letting the band pull it in. Repeat on the other side.
What to check yourself
As the leg moves out, is the trunk leaning to the other side? Is the hip on the moving side hiking? Are the toes turning out? Is the standing knee falling inwards?
Coaching points for trainers
Keeping the trunk and pelvis still matters more than lifting the leg high; work within that range. If the trunk leans, lower the leg or move the band above the knees to make it lighter. Keep the standing knee slightly soft rather than locked.
Caution
Before use, check the band for nicks, tears or stickiness. Hold or loop it securely on your hands or feet so it cannot slip off, do not pull it towards your face, and do not suddenly let go while it is stretched (it can snap back). Stop if you feel pain, numbness or dizziness. If you are receiving treatment, recovering from surgery or pregnant, check with your healthcare professional. If you are allergic to latex, choose a latex-free band. Hold a wall or a sturdy chair back, somewhere you will not lose your balance.
These English notes describe a prototype model. The stretch, foam roller and resistance band lessons are being produced under the supervision of CoconeRu. Move, reviewed in stages. They are not medical advice or an individual exercise prescription.
References
Each note describes what the whole source covers.
NHS — Strength exercises ↗
Strength exercises to do at home (sit-to-stand, wall press-ups and others) and the guide of at least two days a week.
Garber CE et al. ACSM Position Stand: Quantity and Quality of Exercise for Developing and Maintaining Cardiorespiratory, Musculoskeletal, and Neuromotor Fitness in Apparently Healthy Adults. Med Sci Sports Exerc. 2011 ↗
Guidance for healthy adults on resistance exercise: how often, how many repetitions and sets, and rest between sessions.
This lesson was put together for this site from the methods for the same area in the sources above. It has not yet been reviewed by an expert.
About this page
It shows a typical way to do the movement. The 3D is a schematic model; it does not decide whether a lesson suits you, prescribe exercise or diagnose anything. Stop if you feel pain or discomfort.
Sources, supervision and revisions